While general preventive maintenance is the most significant way to extend the life of any equipment, you can do even more to get the most out of your compact wheel loaders.
Here are five ways to take your PM to the next level.
1. COOL IT
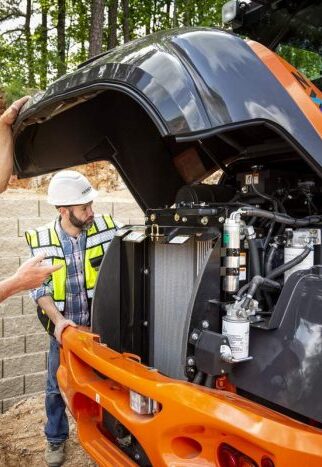
A compact loader can have an “open” roll-over protective structure (ROPS), a heated cab or a fully air-conditioned cab. With an AC system, there are some items that need to be periodically checked, such as compressor belt tension and condition, refrigerant charge and the cleanliness of condenser fans and the recirculation filter. If cooling effectiveness drops and the maintenance steps above do not resolve the problem, the system may need additional service.
When servicing an AC system, keep in mind that the refrigerant must be approved by the EPA and, with the exception of R-744, cannot be intentionally released to the environment. When payment of any kind is involved (including non-monetary), any person working on the system must be certified under section 609 of the Clean Air Act and they must use approved refrigerant handling equipment. Refrigerant must be properly recycled or reclaimed before it can be reused, even if it is being returned to the vehicle from which it was removed. Other rules apply, but these are the key considerations. If you don’t have the resources to do your own work, AC shops will do this as a mobile service.
2. AXLE CARE
Axles and tires are the link to get the power to the ground and carry the load. Axle maintenance is simple: Make sure the mounting bolts to the chassis and wheel rims are retorqued as required in the owner’s manual, and remember to change the axle oil. Over time, the axle oil will also accumulate some wear metals and contaminants from the air. Changing the oil is the only way to purge the contaminants and replace the necessary additives in the axle oil. Axle oil changes are straight-forward, but be sure to use a high-quality oil as recommended in the manual.
3. USE THE RIGHT PRODUCTS
Using bargain fluids and will-fit parts is false economy. As engines and hydraulic systems have become more sophisticated, they have also become more exacting in the products they require, and using the wrong product can have disastrous consequences. For example, there are four current categories of diesel engine oil (CH-4, CI-4, CJ-4 and CK-4) for engines designed to meet various non-road emissions standards, plus another, FA-4, that is meant for on-highway vehicles meeting 2017 greenhouse gas emissions standards. While there is some backward compatibility in the C Series oils, it’s not universal, and FA-4 is absolutely the wrong choice in any engine not specifically designed for it. You’ll find the oil category plus other information, including viscosity, in the API “donut” on the oil container.
There are also multiple types of coolant. Inorganic acid technology (IAT) is the old standard, what used to be referred to as ethylene glycol antifreeze. Organic acid technology and hybrid organic acid technology (OAT and HOAT) are long-life or extended-life coolants. The chemistry of each type is designed to provide maximum protection for the metals used in specific cooling systems, such as copper and brass or aluminum. Despite claims of product-specific compatibility, it’s best to not mix coolant types.
4. CHOOSE THE RIGHT LUBRICANTS
There is an almost endless array of greases based on consistency, thickener type, application (chassis fittings versus lift linkage, for example) and other factors. Choices in hydraulic fluid are as numerous as those for grease. The loader’s owner’s manual will detail product information, but unless you’re a dealer, you might not have the latest updates. Check the manufacturer’s website for current product recommendations. Whatever you do, don’t just grab a jug of something off the shelf in the service department and assume it’ll do the job. Using the wrong product can result in excessive wear and even premature failure.
5. KEEP IT CLEAN
Cleanliness is essential in obtaining full service life from loaders and in minimizing owning and operating costs. Reversing fans, swing-out coolers, water separators and filters are should be kept in clean condition and serviced as required.
Because loaders normally work in extremely dusty conditions, keeping hydraulic oil clean is especially challenging. Hydraulic oil in a compact loader is shared between the hydrostatic drive system and the hydraulic system to steer, raise the loader and tilt the attachment. Since the compact loader is a Jack-of-all-trades, it can have many attachments on the front end. Contamination can come from the environment (dust, dirt, mud, water), from within the machine’s systems (wear metals, seal particles) and from an attachment. Faulty breathers and failing seals can let in a lot of contamination as the system heats up and cools down during and after operation.
The hydraulic system is sealed and pressurized to prevent the entrance of airborne dust particles. The oil from the HST system has an easy-to-change, spin-on filter; the hydraulic system also has a spin-on return filter. And finally, there is a suction strainer in the bottom of the hydraulic tank. These three items combine to stop any particles that came in with the oil, come from the hydraulic components or may have gotten in with the air that occurs when the system is opened to atmosphere.
These are not all-inclusive and are only guidelines, so be sure to follow the manufacturer’s recommendations for all maintenance procedures on your specific machines. You can start with the owner’s manual, but the most current information will be available from your dealer or the manufacturer’s website, where updates and technical service bulletins will be posted.
Checklist For Best Preventive Maintenance Practices
START OF EACH SHIFT
- Check levels of all fluids including fuel, coolant, hydraulic fluid, brake fluid, engine oil and DEF, where applicable
- Check tire pressure and check tires for damage and wear
- Check all safety systems
END OF EACH SHIFT
- Remove all debris, giving special attention to the engine, grille screens and radiator cooling screen
- Check for loose, damaged or missing parts
AFTER THE FIRST 50-100 HOURS
Adhere to the manufacturer’s recommended procedures following break-in. Because manufacturing facilities have become so clean, some manufacturers have greatly reduced the number of procedures required here or have even eliminated this step altogether.
EVERY 50 HOURS
- Check quick-attach or loader pins
- Check and service air pre-cleaner (if so equipped)
- Check tension and condition of drive belts
- Lubricate all grease fittings plus all hinges, pivots, etc.
- Check fuel/water separator and drain as needed
- Check function of all lights and indicators
- Check for leaks in fuel, cooling, hydraulic, drive and brake systems
EVERY 100 HOURS
- Complete a thorough inspection of the entire machine
- Check restriction indicator on air filter; clean filter element if the indicator has tripped
- Check condition of brake pads and replace as needed
- Check torque on all threaded fasteners
- Check for chafing and pinching on the wiring harness
- Check condition of all hoses
- Clean battery terminals
- Check battery electrolyte level, assuming the battery has removable caps
- Check play in brake and clutch pedals and adjust as needed
EVERY 250 HOURS
Change engine oil and filter
EVERY 500-1,000 HOURS
- Change fuel filter
- Change hydraulic and transmission gearbox oil and filters
- Check torque on all threaded fasteners (initial torque check should be at 100 hours on new or rebuilt equipment)
ANNUALLY
- Flush and refill cooling system
- Replace air cleaner elements
- Change axle oil